
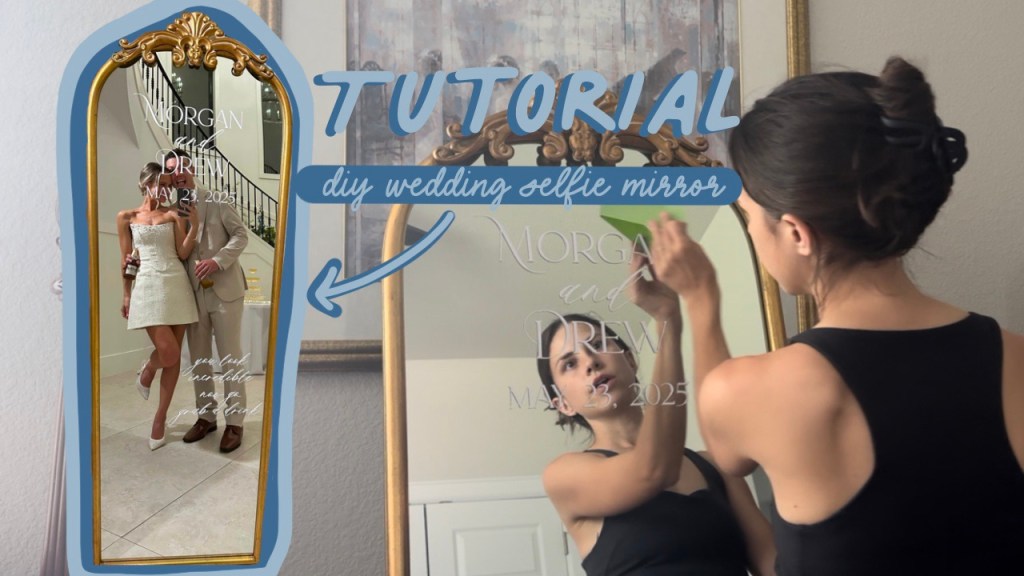
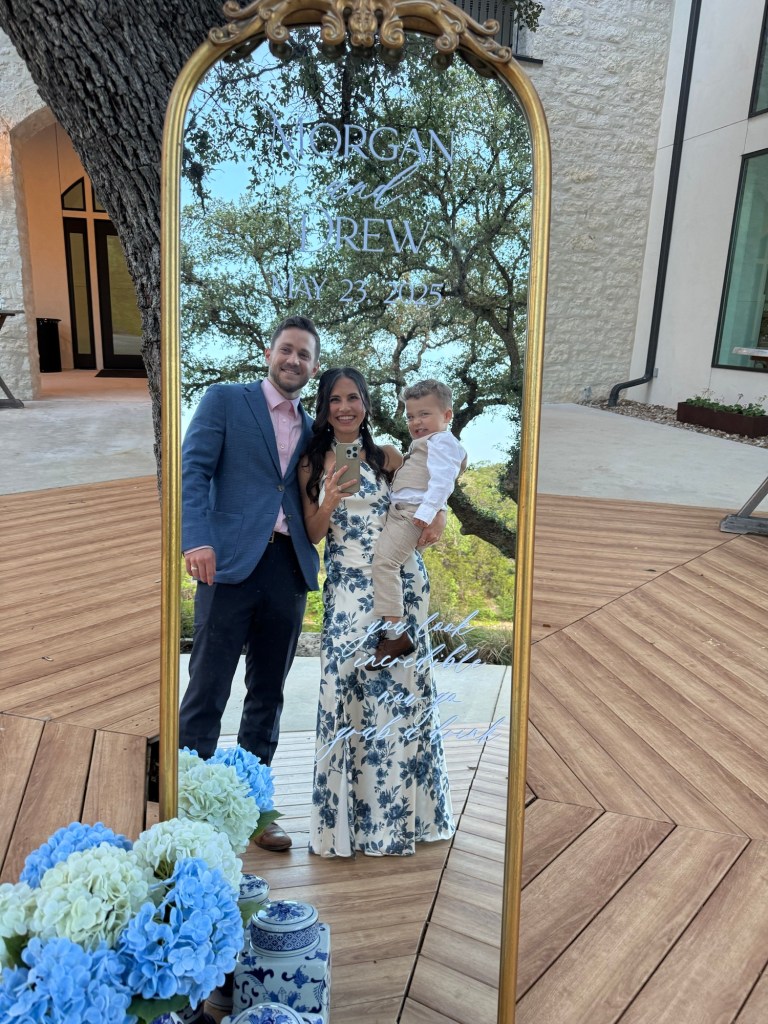
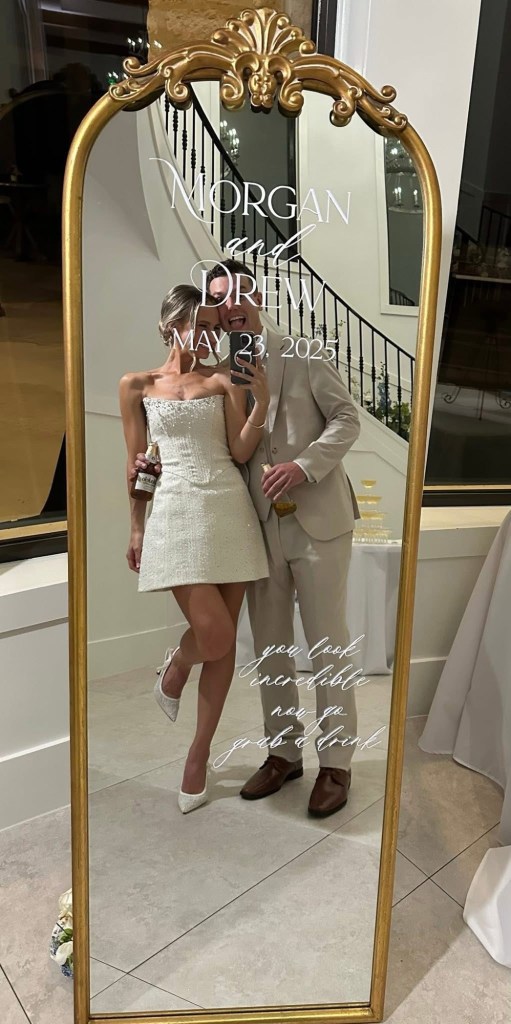
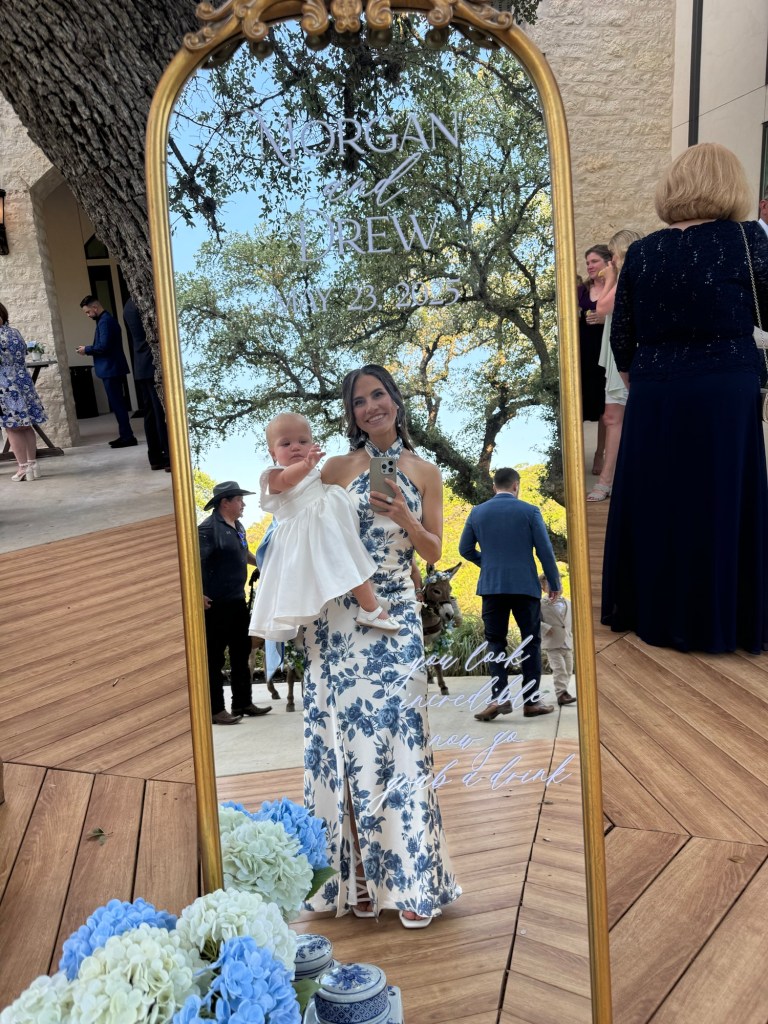
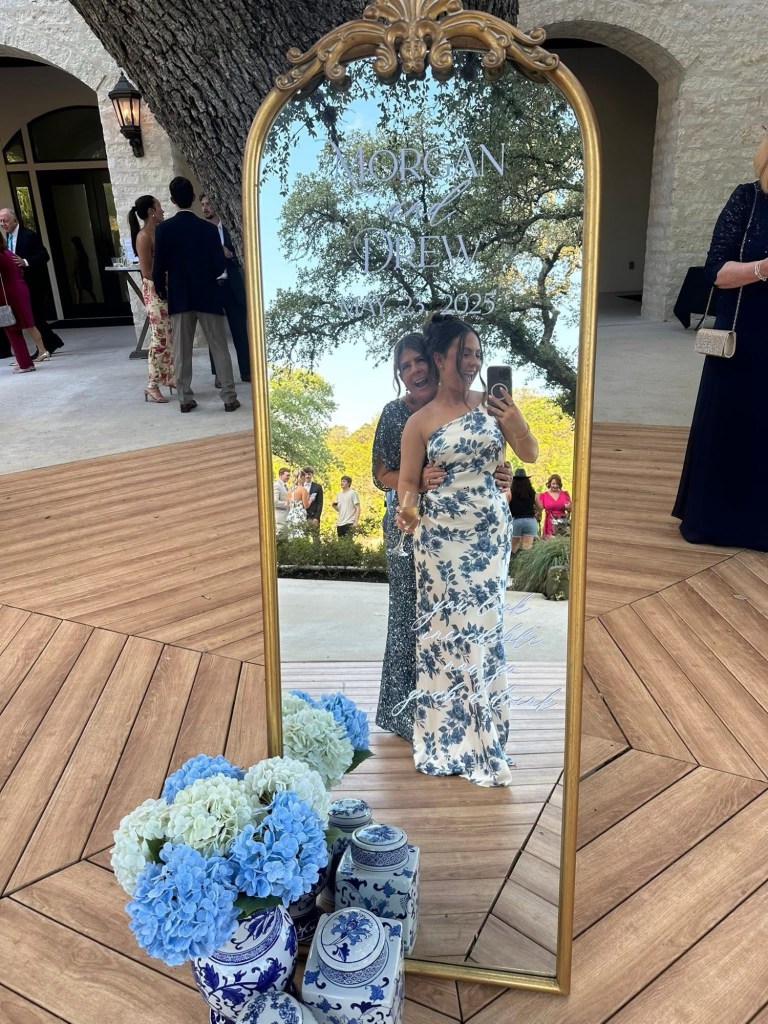
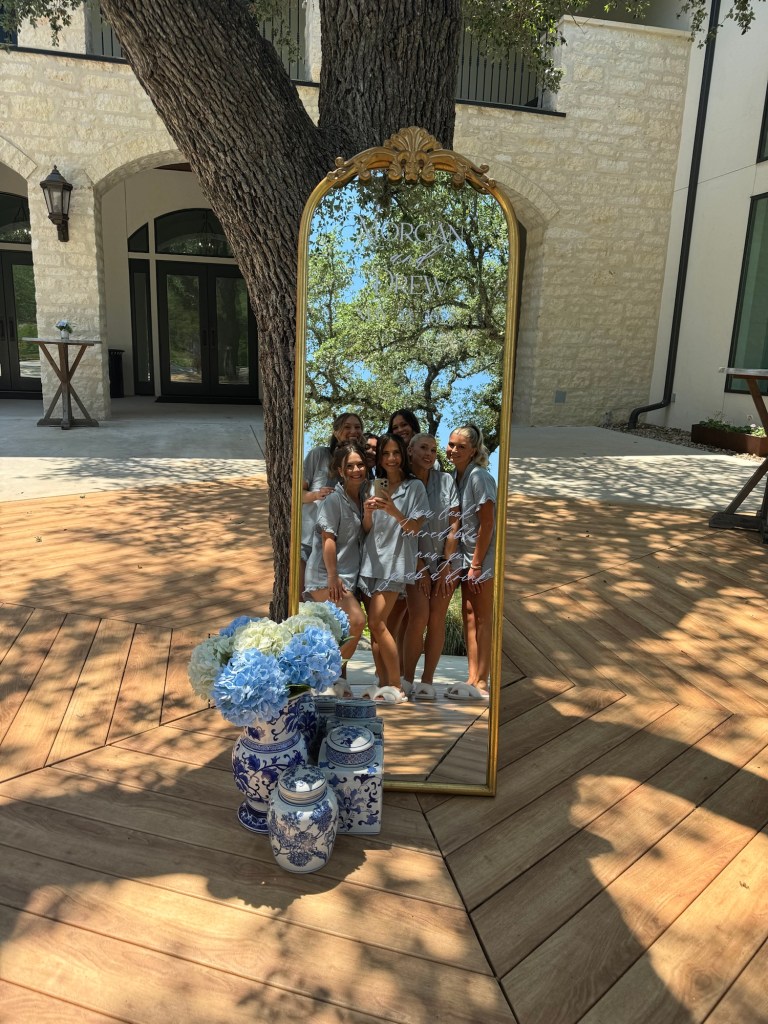
I definitely recommend being a little crafty and creating this super cute wedding selfie mirror. This is the combination of a welcome sign and picture opportunity all rolled into one! This particular mirror sign is perfect for cocktail hour and encourages guest to go grab a drink! I made this sign for my little sisters big day.
Materials/Tools needed…
*all links are affiliate links and may earn commission at no additional cost to you-thanks for supporting the blog🤍*
- Cricut
- https://amzn.to/3Yt46W4
- I have the explore air 2- But any Cricut should work
- https://amzn.to/3Yt46W4
- Basic cricut tools
- https://amzn.to/3A0ThRp
- This set had a spatula, weeder, scraper, a pair of scissors & a pair of tweezers
- https://amzn.to/3A0ThRp
- Permanent White Vinyl
- Transfer Tape
- Measuring tape
- Mirror
- This is where you can really do whatever fits your wedding style best. Size wise I used 66” X 22”, but again you can do really anything. I did like that the one I used had a stand, so it could stand on its own. You would need a type of easel or to lean it up against something if it does not have a stand, just something to think about. Use whatever metal fits your vibe, square or arched, modern or antique- really the possibilities are endless. For this mirror we used the Anthropologie dupe mirror from Costco but I’ve linked some other options here.
- https://amzn.to/3YprfbF
- https://amzn.to/43jW2t5
- https://amzn.to/43OvsIB
- https://amzn.to/3HvFrK4
- https://amzn.to/3YaI2hg
- https://amzn.to/4h6ZmML
- https://amzn.to/3BIFAXL
- Leveler (optional, you can eyeballed it)
- Painters tape (optional)
- Cricut mat
- Fonts I used for this mirror are both from Etsy
Step by step
After you’ve got all your materials, decide on what wording you would like to use. For this mirror I did…
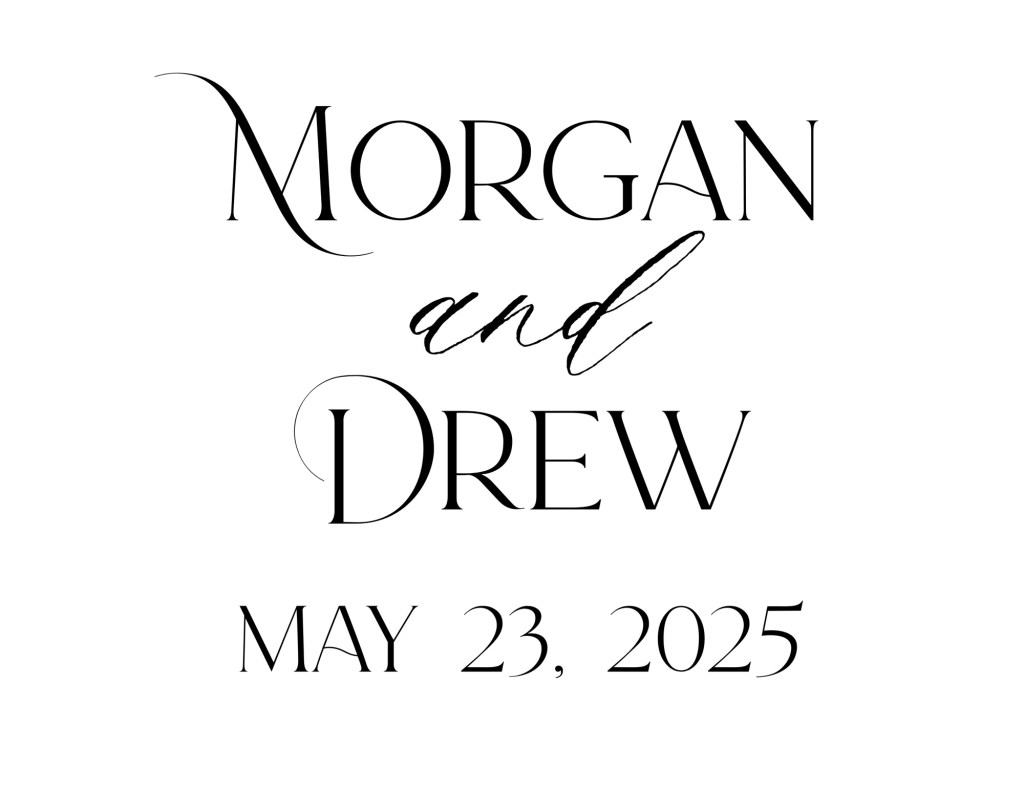
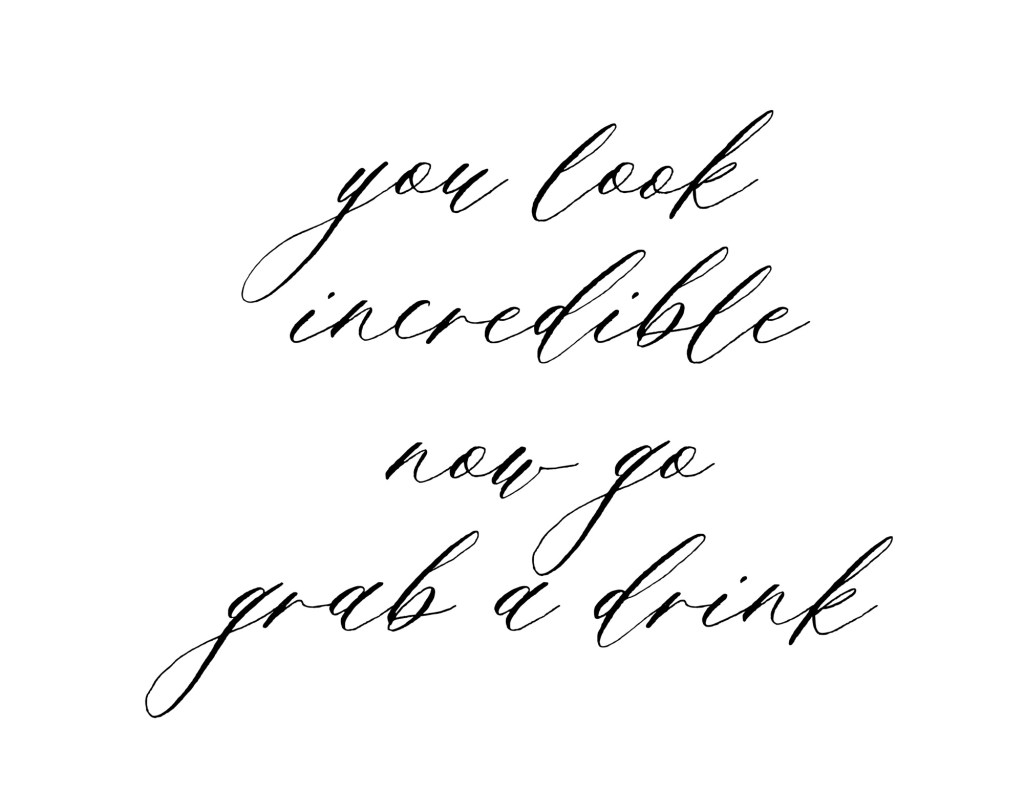
But you can really do whatever you want! I’ve seen “we’re so glad you’re here” “Darling you look perfect tonight” “Welcome to the wedding of…”. Popular elements to include would be the groom and brides name and the wedding date. So be creative and come up with something that’s perfect for your wedding!
Next I used procreate to type up the wording in the font I wanted. If your wondering specifics, These are the fonts I used from Etsy . Don’t worry about size of font at this time, you will size it in the cricut design space. I saved the artwork as jpegs and uploaded it to the cricut design space and removed all of the white background. You don’t need to have procreate to do this. Other options are using the cricut design space fonts or you could use Canva. If using Canva, it will be similar to procreate and just upload that image you made into the Cricut design space.
After uploading your text into the cricut design space you need to size it correctly. I did right under 12 inches across so that it would easily fit on my cricut mat. You could get a longer mat if you need bigger lettering for a larger mirror. At this point you are going to put your white permanent vinyl on the cricut mat-it’s going to be shiny side up. Make sure your settings are set to vinyl. Go ahead and load your mat and let the cricut do it’s thing! In order to get the wording the size I wanted on the mat I had, I did this in separate batches.
Once your vinyl letter is cut, it’s time to weed it. This is where the weeding tool comes in handy. You will be left with just the cut out lettering once your done. It’s now time to stick on your transfer tape. Cut out the correct size and remove the white backing from the transfer tape. Use the the guide lines to help you keep everything level and straight. I used a scraper to help press the vinyl to the transfer tape. Once it’s on, remove the backing and it’s time to attach it to the mirror.
Now I’m getting a little ahead. You need to prep your mirror a little before attaching the lettering. Clean it with a window cleaner. Use a measuring tape and mark your center. You can use painters tape or extra transfer tape scraps. You could also use the leveler and give yourself guide lines. I folded the lettering in half so that I could line that up with the middle of the mirror, ensuring everything is centered. Again using the scraper to apply the vinyl to the mirror before removing the transfer tape. If your scraper is too harsh for your mirror and potentially scratching it, you can put a thin dish towel over your scraper. I learned it was easier to apply the lettering while the mirror is standing up. This way allowed me to still eyeball everything and make sure it was even and level. If you don’t like your lettering placement, carefully use the spatula to remove the vinyl. Clean with a window cleaner to get all the residue off and now you can try again.
For transportation to your venue try and be careful. I recommend lots of blankets and cushions! I actually kept the box/foam the mirror came in and the transport was seamless.
We did have a bag of sand to put on the back of the mirror sign just in case it was windy outside. This depends a little on your location, just something to think about.
PRO TIP: Bring window cleaner the day of your wedding and assign someone the task of cleaning off any fingerprints made in transport!


Leave a comment