Instant Pot Bone Broth (Easy, From-Scratch)
February 6, 2026
Rich, nourishing, and so much cheaper than store-bought. This Instant Pot bone broth is easier than you think.
If you've ever priced out bone broth at the grocery store, you know it's expensive. And honestly? Making it at home is so simple, especially with an Instant Pot. What used to take all day simmering on the stove now takes a fraction of the time, and you end up with a broth that's richer and more flavorful than anything you can buy.
I started making bone broth as a way to use up rotisserie chicken carcasses and random veggie scraps from meal prep. Now it's become one of those things I always have stocked in my freezer. It's nourishing, it's frugal, and it makes everything taste better.
Let's make some broth!

Why Bone Broth Is So Good for You
Before we get into the recipe, here's why bone broth is worth making:
- Gut health: Bone broth contains gelatin and collagen, which support a healthy gut lining and digestion.
- Joint support: The collagen and amino acids (like glucosamine) can help support healthy joints.
- Immune boost: There's a reason your grandma gave you chicken soup when you were sick. Bone broth is packed with minerals and nutrients that support your immune system.
- Hydration: It's full of electrolytes, making it great for staying hydrated.
- Skin, hair, and nails: That collagen does wonders for your skin, hair, and nails too.
Plus, when you make it at home, you know exactly what's going in it and can leave out the weird additives and preservatives.
What You Need
*This post contains affiliate links, in which I may earn a small commission at no additional cost to you—thanks for your support*
Ingredients:
- 2 pounds chicken bones (I use a large rotisserie chicken carcass)
- 8–10 cups filtered water (depends on your Instant Pot size—stay below the max fill line)
- 2 tablespoons apple cider vinegar
- 1 teaspoon salt
- 1 teaspoon peppercorns
- 2 bay leaves
- 1 star anise (winter) OR a handful of fresh herbs (summer: whatever's growing on your patio!)
- Kitchen scraps: onion ends, carrot peels, celery ends, garlic skins (this is all optional but recommended)
Equipment:
- Instant Pot
- Fine mesh strainer
- Large measuring cup (4-cup works great)
- Mason jars (for storage)
- Freezer-safe Ziploc bags (for collecting scraps)
My Kitchen Scrap System
Here's a little tip that makes this whole process so much easier: I keep freezer-friendly Ziploc bags going at all times.
I use rotisserie chickens a lot in my meal prep. Once I've taken all the meat off, I toss the carcass right into a Ziploc bag in the freezer. Then, as I'm making dinner throughout the week, I throw in any kitchen scraps. My favorites are onions, carrots, celery, and garlic.

What ends up happening is I just have these bags ready to go whenever I need to make broth. No extra prep, no waste. It's one of those little systems that makes from-scratch cooking feel effortless.
Step-by-Step Instructions
Step 1: Add the bones and scraps
Place your chicken carcass in the Instant Pot. For me, 2 pounds ends up being about one pretty large carcass. I love the rotisserie chickens from Costco because they're cheap and honestly a lot bigger than the ones from my local grocery store.
Add all your kitchen scraps on top of the bones.
Step 2: Add the water

Pour in your filtered water. For my Instant Pot, I do about 10 cups, which puts me right under the max fill line. Go off of your specific Instant Pot on how much water you need—just don't go above that max fill line.
Step 3: Add the rest of the ingredients

Add in the apple cider vinegar, salt, peppercorns, bay leaves, and your star anise (or fresh herbs).
A note on seasonings: I do the star anise during the wintertime—it adds this subtle warmth that I love. But in the summer, when I have fresh herbs growing in pots on my patio, I'll swap it out for whatever's in season. Rosemary, thyme, parsley—whatever I can grab easily. Both ways are delicious.
Step 4: Pressure cook
Close the lid on your Instant Pot. Select the Soup/Broth setting and set it to the max time—for me, that's 4 hours.
Once the 4 hours are done, don't do any quick release or anything like that. Just set it for another 2 hours on the Soup/Broth setting. For my instant pot I have to cancel/turn it off and then turn it back on and set it for an additional 2 hours. This gives you a total of 6 hours of cooking time, which really extracts all the good stuff from those bones.
Step 5: Let it cool
Once it's done, I don't bother with natural release or quick release. I just turn it off so it's not on the keep warm mode.

This is usually about the time I'm putting my kids to bed. So I'll go ahead and do bedtime, and let that broth cool down a bit while I'm busy. It's going to be quite hot, so this cooling time is actually really helpful.
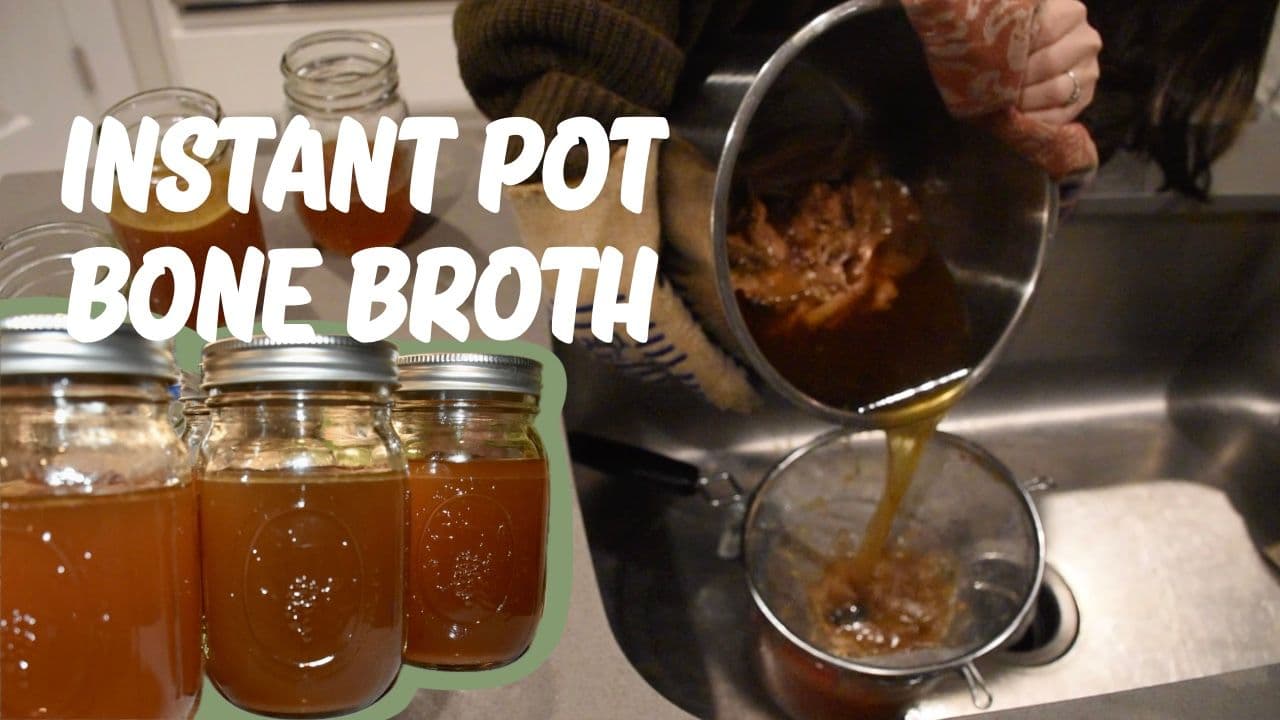
Step 6: Strain the broth
Once my kids are asleep and the broth has cooled down a little, it's time to strain.

I take a fine mesh strainer and set it over a large measuring cup (mine is a 4-cup). Pour the bone broth through the strainer. This will catch all the bones, scraps, and bits so you're left with just the beautiful golden broth.
Step 7: Jar and store
Now for the jarring! I haven't gotten into water bathing or pressure canning yet, so my workaround is to freeze the broth in mason jars. It's the easiest way for me to keep it good the longest.

My mason jars do best when filled with about 1½ cups of broth each. Leave a little headspace at the top since liquids expand when frozen. This amount is going to depend on how large your jars are.
Once all the jars are filled, let them cool to room temperature on the counter. Then pop them in the freezer.
Storage Tips

Refrigerator: Fresh bone broth will keep in the fridge for up to 5 days. You might notice it gets jiggly and gelatinous when cold—that's a good sign! It means you extracted lots of collagen.
Freezer: Frozen bone broth in mason jars will keep for up to 6 months. Just make sure to leave headspace and let it cool completely before freezing to prevent the jars from cracking.
My system: I like to keep one jar defrosted in my refrigerator at all times so I always have broth ready to cook with. Then if I know I'm making soup or using a bunch of broth, I'll pull jars out ahead of time to defrost.
Ways to Use Bone Broth
Once you have homemade broth on hand, you'll find yourself using it for everything:
- Soups and stews
- Cooking rice or grains (use broth instead of water!)
- Deglazing pans for sauces
- Braising meats
- Sipping it warm in a mug (especially great when you're feeling under the weather)
- Adding to mashed potatoes for extra flavor
- Making gravy
- Cooking beans
Final Thoughts

Making bone broth at home used to feel intimidating to me, but the Instant Pot makes it so hands-off. I love that I can use up rotisserie chicken carcasses and veggie scraps that would otherwise go in the trash. It's frugal, it's nourishing, and it tastes so much better than the store-bought stuff.
If you start keeping a scrap bag in your freezer, you'll always be ready to make a batch. Once you get into the rhythm, it really does become effortless.
This is my homesteading in the suburbs version. One day, yes, I would love to have meat chickens and use all the different parts. But right now, while I'm in the suburbs and can't do that, this is the easiest way for me to make bone broth without going out of my way to buy bones or pieces of chicken that I'm not actually going to eat or use unless it's for broth. It's just a lot less complicated.
If you try this recipe, I'd love to hear how it turns out! Tag me so I can see your broth-making adventures.
Recipe: Instant Pot Bone Broth (Easy, From-Scratch)

Prep
20 min
Cook
6 hours
Servings
10
Adjust Servings
Ingredients
0 of 8 ingredients checked
Instructions
- 1Place chicken carcass and kitchen scraps in your Instant Pot.
- 2Add filtered water to just below the max fill line.
- 3Add apple cider vinegar, salt, peppercorns, bay leaves, and star anise (or fresh herbs).
- 4Close lid. Set to Soup/Broth for 4 hours.
- 5When done, set for another 2 hours (6 hours total). No quick release needed.
- 6Turn off and let cool slightly.
- 7Strain through a fine mesh strainer into a large measuring cup.
- 8Pour into mason jars (about 1½ cups each-depending on size of jar). Cool to room temperature, then freeze.
- 9My method is to keep one jar defrosted in the fridge for easy cooking. Defrost others as needed.
Made this recipe?
I'd love to know how it turned out! Your rating helps other mamas find the best recipes.
Rate & ReviewRate & Review This Recipe
Be the first to rate this recipe!
Enjoying this post?
Get more from-scratch recipes and kitchen tips delivered to your inbox weekly. Join 35,000+ families already following along!