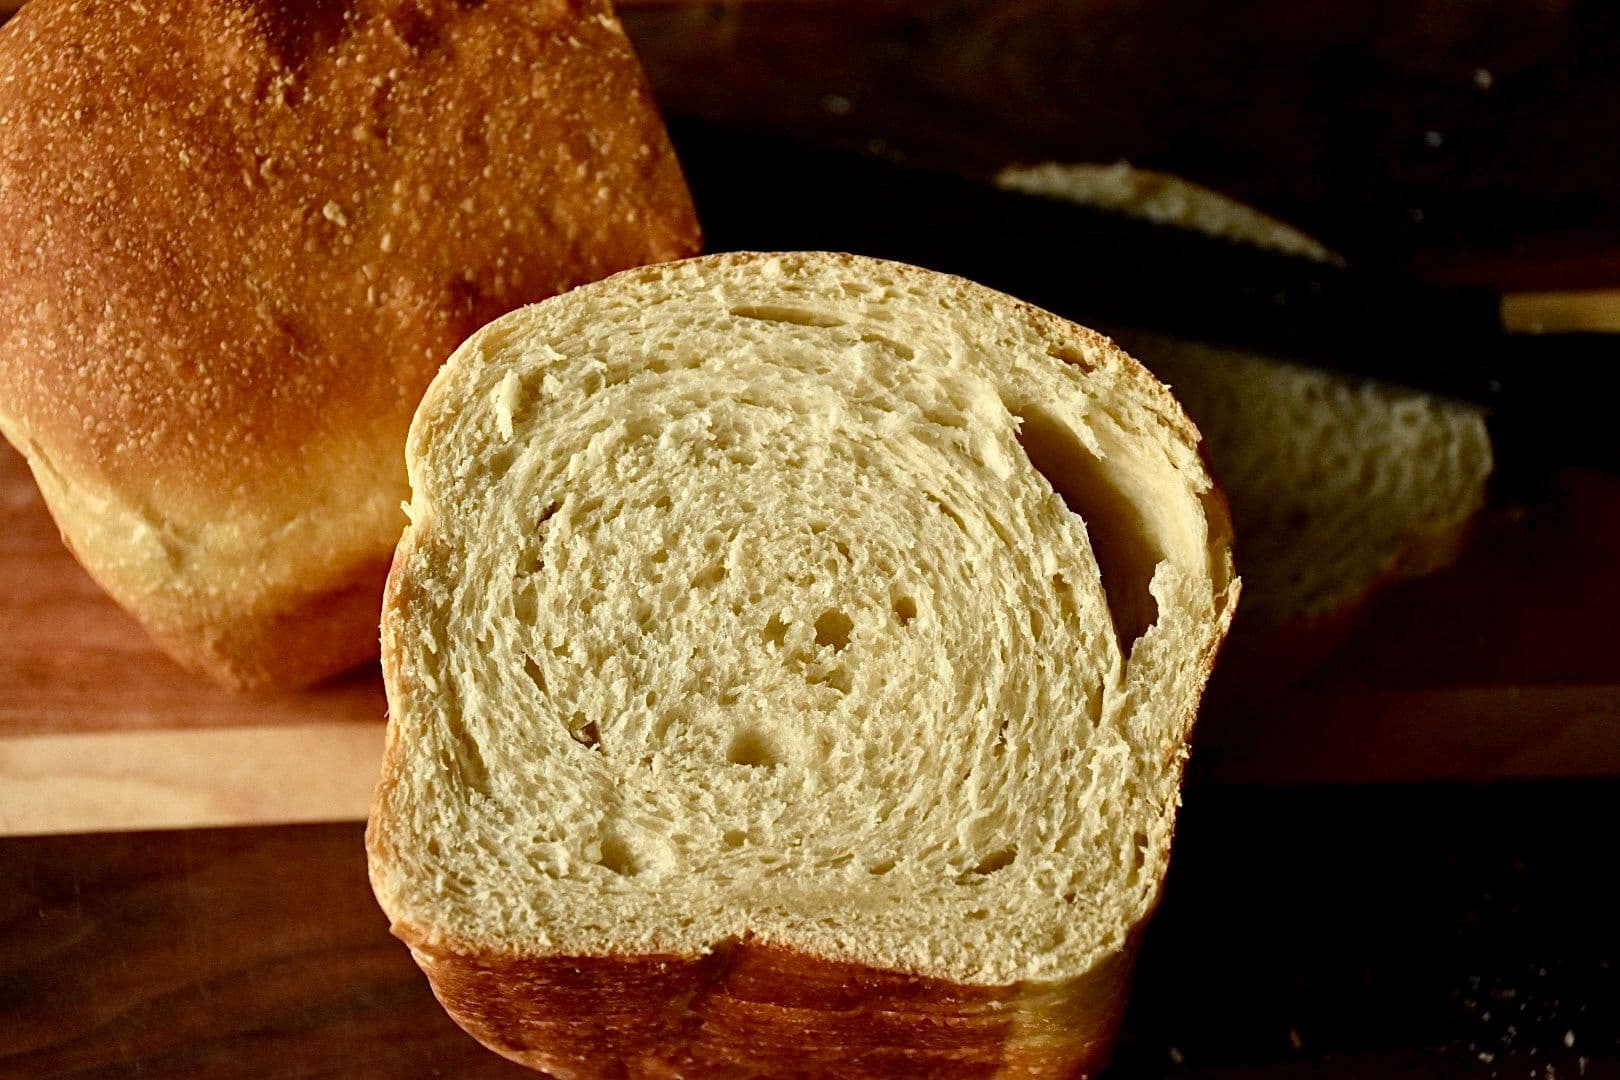
Easy Sourdough Sandwich Bread (One Day, No Mixer)
February 16, 2026
If you've been looking for a sourdough sandwich bread that you can pull off in a single day, well this is it. This is the loaf that lives in our house pretty much all the time. It's soft, it's got that perfect chew, and it makes the best sandwiches, toast, and French toast you've ever had. My kids absolutely love it, and honestly, once you start making your own sandwich bread, it's really hard to go back to store-bought.
The beauty of this recipe is that it's flexible. I typically do this as a one-day loaf, but if life gets in the way or you just want a deeper flavor, you can easily extend it into a two-day bake with an overnight cold ferment. Either way, you're going to end up with an incredible loaf.
No stand mixer needed. Just a Danish whisk, your hands, and a little patience. Let's do this.
Why This Bread Works So Well

Honey and Butter — These give the bread that soft, slightly sweet quality that makes it perfect for sandwiches. The honey also helps with browning and keeps the crumb tender. Because of both of these, you'll want to keep an eye on browning toward the end of the bake.
Sourdough Starter — You get all the benefits of sourdough — better digestibility, that subtle tang, amazing texture — without it being an overwhelming sour flavor. This is a sandwich bread first, sourdough second.
One-Day Flexibility — By feeding your starter at a 1:10:10 ratio the night before, it rises slowly overnight and peaks right when you're ready to bake in the morning. No rushing, no guessing. But if you'd rather do a two-day loaf, I've got you covered on that too.
*this post contains affiliate links, in which I may earn a small commission at no extra cost to you-thanks for the support*
Ingredients
- 4 cups all-purpose flour (480g)
- ½ cup active sourdough starter (120g)
- 2 teaspoons salt (12g)
- 1 cup lukewarm filtered water (240g)
- 4 tablespoons melted unsalted butter (56g)
- 1½ tablespoons honey (32g)
Equipment
- Large mixing bowl
- Danish whisk
- 9×5 inch loaf pan
- Parchment paper
- Plastic wrap or damp dish towel
- Wire cooling rack
Instructions
The Night Before: Feed Your Starter
If you're doing this as a one-day loaf, feed your starter the night before at a 1:10:10 ratio. This rises a lot slower, so when you wake up in the morning, your starter should be right at its peak and ready to go.
*If you plan on extending this to two days then you can feed your starter like normal in the morning. Then after that typical 4-6 hour rise use your starter when it’s at its peak and active.
Step 1: Mix the Dough
In the morning, combine your starter, lukewarm water, melted butter, honey, and salt in a large bowl. Mix everything together with a Danish whisk until it's well incorporated.

Add all of your flour and mix with the Danish whisk. The whisk is only going to do so much here. Once it gets too thick, switch to using wet hands and mix it the rest of the way. Try to incorporate everything as much as you can. Making sure all the flour is hydrated and everything is combined.
Step 2: Autolyse
Cover your bowl with a damp dish towel and let it sit for 30 minutes. This rest lets the flour fully absorb the water and starts developing gluten without any work from you.
Step 3: Stretch and Folds
After the 30-minute rest, do 3–4 sets of stretch and folds, spaced 30 minutes apart. Grab one side of the dough, stretch it up, and fold it over to the other side. Rotate the bowl and repeat on all four sides. That's one set. Cover with your damp towel between each set.

Step 4: Bulk Fermentation
After your last set of stretch and folds, cover the bowl and let the dough bulk ferment. This is going to take roughly 6-8 hours. I really recommend to not just go by the clock. The warmer your kitchen, the faster this goes. The colder your kitchen, the slower. I really try to go off what the dough itself is looking like rather than just timing. You want to see a roughly 50% increase in size.
Want to make this a two-day loaf? This is where you'd do it. Instead of moving to shaping, cover your bowl with plastic wrap or beeswax wrap and stick it in the fridge for an overnight cold ferment. Pull it out the next morning, let it come to room temp for about an hour, and then continue on to shaping. The second rise in your loaf pan may take longer if your dough is still a little cold from the fridge.
Step 5: Shape the Loaf
Get out your 9×5 inch loaf pan — you'll use it as a reference for how wide your rectangle needs to be. Grease the pan with butter and line the bottom with a cut rectangle of parchment paper.

Turn your dough out onto a lightly floured surface. Using your hands, gently press the dough into a rectangular shape. Use your loaf pan as a guide for the width. While you're pressing this out, you want to release the large air bubbles, but don't over-handle or over-knead because we want to keep those tiny bubbles intact. Those are what give you those good nooks and crannies in the crumb.


Once you've got your rectangle, roll it up like a jelly roll from the long edge to form a tight, even log. Pinch the seam underneath and tuck the ends slightly to avoid spreading. A little tip, wetting your fingers can prevent sticking and tearing here.
Place the dough seam-side down in your prepared loaf pan. Smooth the top slightly with wet fingers.
Step 6: Final Proof
Cover the pan with plastic wrap or a damp towel and let it rise for 2-3 hours. Again, this depends on how warm your kitchen is, so keep checking on it. The dough should rise to just to the top of the pan. You definitely don't want to let it overproof here. If it goes too far, it can collapse in the oven.

A quick test: poke the dough gently with your finger. It should spring back slowly. If it springs back fast, it needs more time. If it doesn't spring back at all, you may have overproofed.
Step 7: Bake
Preheat your oven to 375°F (190°C).
Bake for 35–40 minutes until golden brown. Because of the honey and butter in this bread, keep an eye on the browning. You may need to tent with foil for the last 10 minutes if it's getting too dark too fast. Of course every oven is different but I definitely always have to tent with foil once it gets browned.
Step 8: Cool

Let the bread cool in the pan for 5–10 minutes, then remove it and finish cooling completely on a wire rack. Let it cool for at least 1 hour before slicing. I know it's tempting, but cutting into hot bread is going to give you a gummy texture and compress the crumb. Just give it time.
Tips and Tricks
- Feed your starter the night before — That 1:10:10 ratio is key for a one-day bake. It peaks slowly overnight and is ready when you are.
- Wet hands are your best friend — When mixing and shaping, keep your hands wet. It prevents sticking and tearing and makes everything so much easier to work with.
- Go by the dough, not the clock — Kitchen temperature changes everything. A bulk ferment could be 3 hours in a warm kitchen or 5+ in a cold one. Look for the dough to be doubled, puffy, and bubbly.
- Don't over-handle during shaping — Pop the big bubbles, but keep those small ones. That's your crumb texture right there.
- Use your loaf pan as a guide — Hold it up next to your dough rectangle so you know exactly how wide to press it. This gives you a perfectly shaped loaf every time.
- Poke test for the final proof — Gently poke the dough. Slow spring-back means it's ready. Fast spring-back means give it more time.
- Tent with foil if needed — The honey and butter brown fast. If your loaf is getting dark before the 30-minute mark, cover it loosely with foil.
- Wait to slice — At least 1 hour maybe more. The bread is still cooking internally as it cools, and slicing too early will give you a gummy, compressed crumb. If you are still finding a gummy center after cutting a cooled loaf you may just need to increase the baking time by about 5 minutes.

Storage
- Counter: Store in a bread bag or wrapped in beeswax wrap at room temperature for 3–4 days.
- Freezer: This bread freezes beautifully. Slice it first, then store in a freezer-safe bag. You can pull out individual slices and toast them straight from frozen. It'll keep for up to 3 months.
- Avoid the fridge: Refrigerating bread actually speeds up staling. Try to keep either room temp or in the freezer.

This bread is a staple in our house. My kids love it for sandwiches, and it makes unreal toast. It stores so well in the freezer too. Just slice it up, bag it, and pull out slices whenever you need them. Once you get the hang of this one, you'll never want to buy sandwich bread again.
Happy baking, friends.
Recipe: Easy Sourdough Sandwich Bread (One Day, No Mixer)

Prep
~8 hours (~30 min active time)
Cook
30-35 minutes
Ingredients
0 of 6 ingredients checked
Instructions
- 1Night before: Feed starter at 1:10:10 ratio.
- 2Morning: Mix starter, water, melted butter, honey, and salt with a Danish whisk.
- 3Add flour, mix with whisk then wet hands until combined.
- 4Cover with damp towel, rest 30 minutes.
- 5Do 3–4 sets of stretch and folds, 30 minutes apart.
- 6Bulk ferment ~6 hours (after you can cold ferment overnight in fridge for a two-day loaf).
- 7Turn out onto floured surface. Press into rectangle using loaf pan width as guide.
- 8Roll into a tight log from the long edge. Pinch seam, tuck ends.
- 9Place seam-side down in greased/lined 9×5 pan. Cover and proof 2-3 hours until dough rises just above the pan.
- 10Bake at 375°F (190°C) for 35-40 minutes. Tent with foil if browning too fast.
- 11Cool in pan 5–10 minutes, then wire rack for at least 1 hour before slicing.
Made this recipe?
I'd love to know how it turned out! Your rating helps other mamas find the best recipes.
Rate & ReviewRate & Review This Recipe
Be the first to rate this recipe!
Enjoying this post?
Get more from-scratch recipes and kitchen tips delivered to your inbox weekly. Join 35,000+ families already following along!