Salted Brown Butter Toffee Sourdough Chocolate Chip Cookies
June 9, 2026
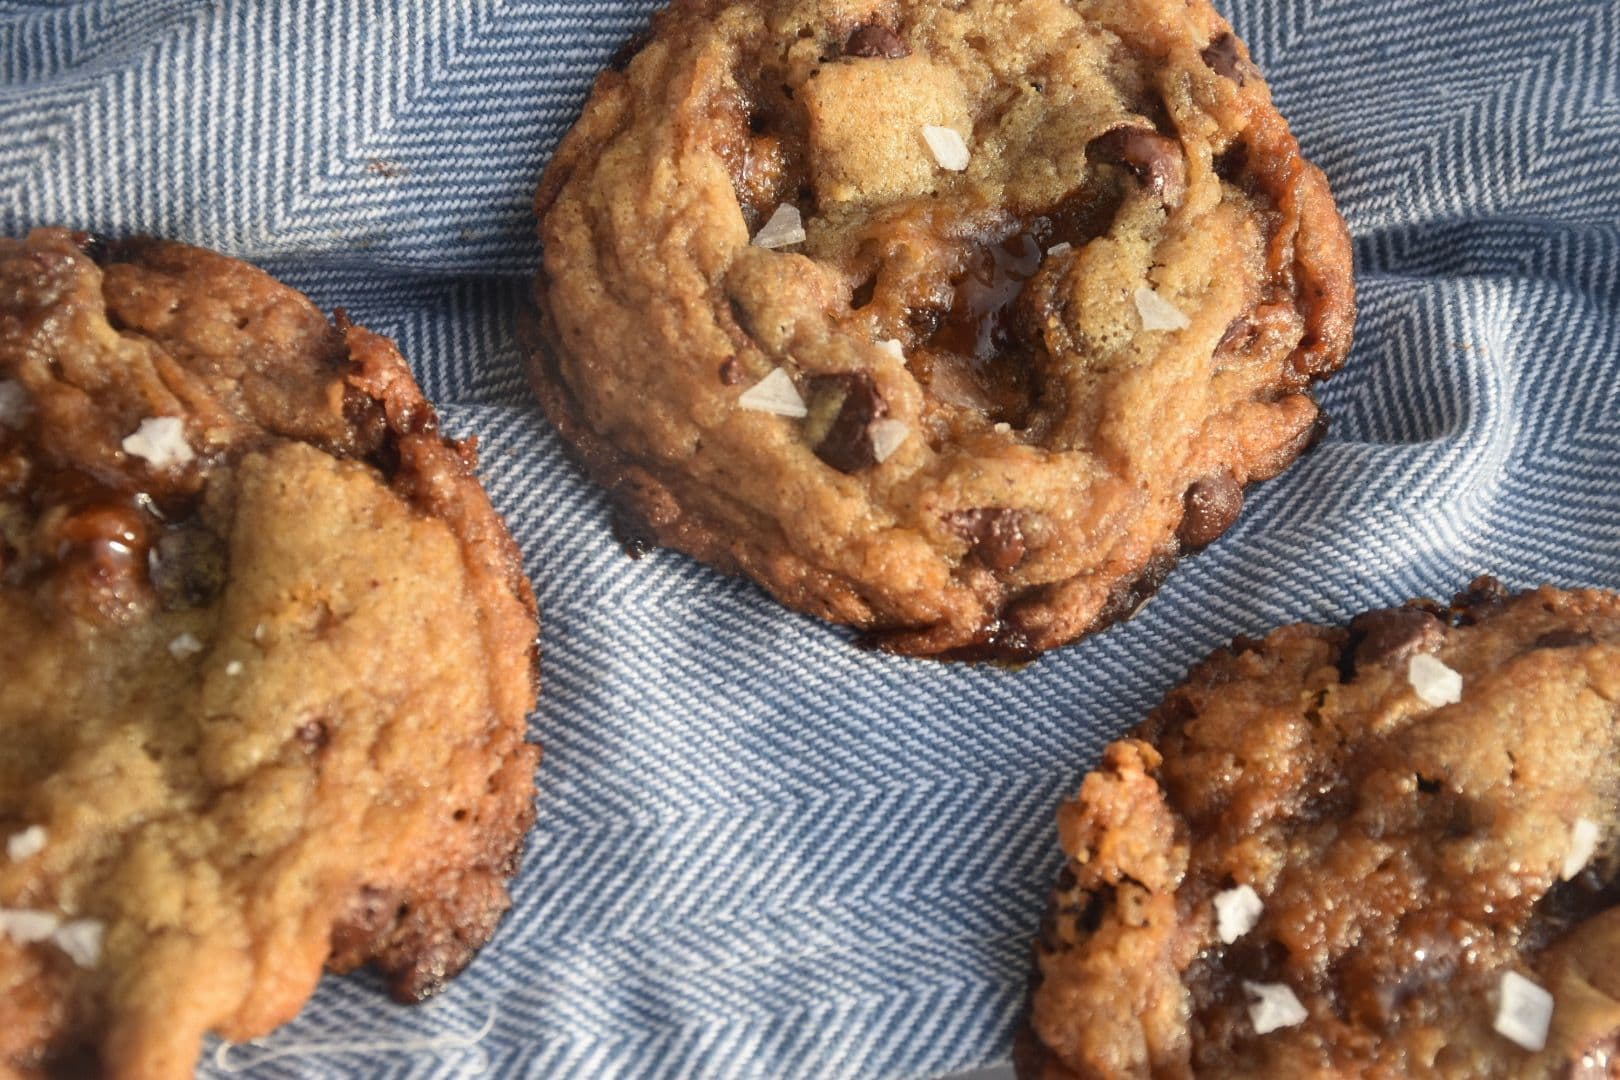
If you've made my original sourdough chocolate chip cookies, you already know they're chewy, deeply brown-buttery, and have that perfect slight tang from the sourdough. This version takes that exact same base cookie and adds two things that turn it into something special: homemade toffee shards folded into the dough, and a finish of flaky sea salt on top.

The toffee melts into chewy caramelized pockets along the edges of the cookie and stays crisp in the center, so you get two different textures in every bite. Paired with the nutty brown butter, the sourdough tang, and that little crunch of salt at the end, these are the cookies that disappear before they even finish cooling.
The best part: if you've made the original, you've already done the hard part. The only new component here is the homemade toffee, which sounds intimidating but is really just butter and sugar cooked together until they turn amber. It takes about 10 minutes.
Why brown butter, toffee, and sourdough work so well together

Brown butter brings depth, it is toasted, nutty, almost caramel-like. Homemade toffee doubles down on that caramel note with deeply cooked sugar. The sourdough starter adds a slight tang that keeps everything balanced and not too sweet. Finish with flaky salt and you've got the cookie version of a really good salted caramel.
Ingredients and equipment
Here's everything you'll need so you can shop your pantry and set up your station before you start.
This post contains affiliate links, in which I may earn a small commission at no additional cost to you. Thanks for your support!
Ingredients for the toffee:
- 1/2 cup unsalted butter, cut into tablespoon pieces
- 1/2 cup granulated sugar
- 1/2 tsp water
- Pinch of fine salt
Ingredients for the cookies:
- 1/2 cup unsalted butter (for browning)
- 1 cup + 2 tbsp all-purpose flour
- 1 tsp cornstarch
- 1/2 tsp baking soda
- 1/2 tsp fine salt
- 1/2 cup sourdough starter (discard or active)
- 2/3 cup packed light brown sugar
- 1/4 cup granulated sugar
- 1 large egg yolk
- 1 tsp vanilla extract
- 1 cup dark chocolate chips
- 1/2 cup chopped homemade toffee (from above)
- Flaky sea salt for finishing (Maldon is my favorite)
Equipment for the toffee:
- Small heavy-bottomed saucepan with a light-colored interior (stainless steel is ideal)
- Candy thermometer or instant-read digital thermometer
- Wooden spoon or heat-safe silicone spatula
- Half sheet pan
- Parchment paper
- Heavy chef's knife and cutting board for chopping
Equipment for the cookies:
- Caraway Stainless Steel Baking Sheet
- Glass Bowls
- Silicone Spatula
- Whisk
- Cookie Scoop
- Mixer
- Silicone Sheets
- Light-colored saucepan for browning butter
- Wire cooling rack
A note on active starter vs discard
Just like the original recipe, you can use either active starter or discard here and both work beautifully. Discard gives you a deeper tang with no extra rise. Active starter adds a subtle lift and tenderness. My personal preference is sourdough discard with a 24 hour ferment in the fridge. This gives you that signature tangy sourdough flavor with the convenience of using up your discard, and the long ferment lets the sourdough break down the gluten and develop a richer, more complex flavor. If you're short on time, a 30 minute to 1 hour chill works too.
Making the homemade toffee

Real talk: making toffee from scratch was one of those revelations I've had since I started cooking more from scratch. It's something I would have automatically grabbed off a grocery store shelf before and I never would have thought to make it myself. But once you realize toffee is literally just butter and sugar, and that it comes together in about 10 minutes start to finish, you'll never look at it the same way again. This has happened to me over and over since I started cooking from scratch - so many things I assumed were complicated and store-bought turn out to be ridiculously simple, with way better ingredients than anything I could buy.
Don't let toffee intimidate you - it's just butter and sugar cooked to hard crack stage (300°F). The only rules are: don't walk away, watch the color, and have everything set up before you turn on the heat.
What you'll need:
- Small heavy-bottomed saucepan with a light-colored interior (stainless steel is ideal - dark nonstick makes it impossible to see the color change)
- Candy thermometer or instant-read digital thermometer
- Half sheet pan lined with parchment paper, set up right next to the stove
- Wooden spoon or heat-safe silicone spatula
Toffee Step 1: Combine everything in a cold pan
In your saucepan, combine 1/2 cup unsalted butter (cut into tablespoon pieces so it melts evenly), 1/2 cup granulated sugar, and 1/2 tsp water. Don't turn the heat on yet.
Toffee Step 2: Cook slowly over medium heat

Turn the heat to medium, not medium-high. Stir gently and continuously with your wooden spoon in a slow figure-8 pattern. The butter melts first, then the sugar starts dissolving into it. Around the 3-4 minute mark you'll see bubbling start. The mixture might look slightly greasy at this stage. That's normal, keep stirring gently and it comes back together.


Toffee Step 3: Switch to swirling once it's fully bubbling
Once everything is fully liquid and actively bubbling, stop stirring with the spoon and just swirl the pan occasionally instead. Aggressive stirring at this point is the number one cause of grainy toffee.
Toffee Step 4: Watch the color change


This is where you cannot look at your phone. The toffee moves through stages: pale yellow → straw → light amber → deep amber → copper penny. The first few minutes are slow, but the last 2-3 minutes go fast. Keep your thermometer in the pan and your eyes on the color.
Toffee Step 5: Pull it at the right moment
Take it off the heat when it hits 300°F AND looks like a freshly minted copper penny. Use both signals because color is actually the most reliable indicator, because thermometer placement can be off. If you smell anything bitter or acrid, pull it immediately because that means you've gone too far.
Toffee Step 6: Pour onto parchment
The second it hits temperature, immediately pour onto your parchment-lined sheet pan in a rough rectangle shape. Do not try to spread it with a spatula - it self-levels to about 1/4 inch thickness, which is perfect. Don't scrape the pan to get the last bits because that scraped residue can be slightly crystallized and affect the smooth texture.
Toffee Step 7: Cool completely

Set the pan aside on the counter and walk away for 30-45 minutes. Do not put it in the fridge or freezer to rush it because condensation will make the surface tacky. Just let it cool slowly at room temperature.
Toffee Step 8: Break and chop
Once fully cool and hard, lift the whole parchment sheet off the pan and break the toffee into large pieces by hand or by tapping with the back of a wooden spoon. Transfer to a cutting board and chop with a heavy chef's knife into roughly 1/4 inch pieces. It gets loud - that's part of the fun.
You should end up with about 3/4 cup chopped toffee. You'll use 1/2 cup folded into the cookie dough, and you can save the extra snack on while you wait for the dough to chill.
A few toffee troubleshooting tips:
- If you see butter pooling during the cook: lower the heat one notch and stir more vigorously, you can re-emulsify it mid-cook before it's too late.
- If butter separates when you pour: gently blot the excess with paper towels while still warm. The toffee underneath will still set and work fine in cookies.
- If the toffee comes out slightly grainy or chewy instead of brittle: don't throw it out. It'll still work in the cookies because the chocolate and dough mask any texture issues.
- If it's burnt or bitter: start over. The flavor doesn't bake out.
Making the cookies
The cookie base is exactly the same as my original recipe. I didn't change a thing. The toffee gets folded in alongside the chocolate chips, and the flaky salt goes on top after they come out of the oven.
Step 1: Brown the Butter
Using a light-colored pan (so you can see the color change), melt unsalted butter over medium heat. Watch for foaming. Stir occasionally to prevent burning. After a few minutes, small brown bits will form at the bottom of the pan, and the butter will turn golden brown. You'll smell a rich, nutty aroma, this means it's ready. Once browned, immediately transfer the butter to a heatproof bowl to prevent burning. Let the butter cool down.
Step 2: Prepare Dry Ingredients

In a bowl, whisk together flour, cornstarch, baking soda, and salt. Set to the side.
Step 3: Mix Wet Ingredients
In a separate large mixing bowl, whisk together the cooled brown butter, brown sugar, and granulated sugar until combined and slightly creamy. You can do this by hand, with a hand-held electric mixer, or with a stand mixer. Whisk for about 1 minute - the sugars should turn a slightly lighter color.

Mix in the egg yolk and vanilla extract until smooth. Then add your sourdough starter (discard or active). I start by whisking the starter into the sugar mixture with my Danish whisk, then smooth it out with a silicone spatula.
Step 4: Combine Wet and Dry

Slowly combine the dry ingredients into the wet ingredients with a silicone spatula until a dough forms. Mix until just combined, try not to overmix at this point.
Step 5: Add Chocolate Chips, Toffee, and Chill

Fold in the dark chocolate chips and the chopped toffee at the same time. Cover the dough and refrigerate. You need at least 30 minutes to 1 hour for the quick method. For best flavor, I prefer a long ferment of at least 12 hours (up to 48 hours). The sourdough helps develop flavor while chilling, enhancing both taste and texture.
Step 6: Shape and Bake
Preheat the oven to 350°F and line a baking sheet with parchment paper or a silicone mat. Using a cookie scoop, portion the dough onto the prepared baking sheet about 2 inches apart. For these cookies I like to use a 3 tablespoon scoop, the larger size gives you that bakery-style cookie with a soft, gooey center and crisp edges, which works perfectly with the toffee texture.
Bake for 11-14 minutes, but please go by visual cues, not the timer. Every oven runs a little differently, and the difference between a perfect cookie and an overbaked one can be a single minute. You want the edges just barely browned and set, with the centers still looking slightly underbaked. They'll continue cooking on the hot pan after you pull them.
Because of the toffee crunch, I really recommend erring on the side of undercooked rather than overcooked. Pulling them a touch early keeps the centers chewy and lets the toffee stay distinct, if you overbake, the toffee can over-caramelize and the cookies lose that soft middle that makes them so good. When in doubt, pull them early - you can always pop a tray back in for another minute, but you can't undo an overbaked cookie.
If you prefer smaller cookies, a 1.5 tablespoon scoop also works beautifully. Just reduce the bake time to around 7 minutes and still watch for those just-browned edges.
Step 7: Scoot the Cookies (if needed)
If any toffee bits ended up on the outer edges of the cookies, those bits will melt and pull the cookie into an uneven shape during baking. The good news is there's an easy fix that bakeries use all the time and it's called "scooting" the cookies.
The moment they come out of the oven, while they're still hot and pliable, grab a round cookie cutter or the rim of a wide drinking glass or jar (something slightly larger than the cookie itself). Place it over one cookie at a time and gently swirl it in small circular motions around the cookie's edges. The cutter pushes the spread-out edges back into a perfect round shape. It takes about 5 seconds per cookie and makes a huge visual difference. Your cookies will go from rustic and uneven to bakery-perfect circles. Work fast though because the cookies firm up quickly and the technique only works while they're still hot.
Step 8: Salt, Cool, and Enjoy

As soon as the cookies are shaped (or straight out of the oven if they didn't need scooting), sprinkle the tops with flaky sea salt. Do this while they're still warm and the surface is a little tacky, which helps the salt stick.
Let them cool on the baking sheet for about 5 minutes, then transfer to a wire cooling rack. The toffee bits will firm up slightly as the cookies cool, giving you those chewy caramelized pockets along the edges and crisp bits throughout the middle.
Store in an airtight container at room temperature for up to 5 days, or in the fridge for up to a week.
Recipe: Salted Brown Butter Toffee Sourdough Chocolate Chip Cookies

Prep
30 min (plus 30 min- 48 hr chill)
Cook
12 min
Ingredients
For the homemade toffee
For the cookies
0 of 16 ingredients checked
Instructions
- 1Make the toffee first: Combine butter, sugar, and water in a cold saucepan. Cook over medium heat, stirring gently and continuously until the butter melts and sugar dissolves. Once bubbling, switch to swirling the pan occasionally. Cook until the mixture reaches 300°F and turns a deep copper penny color (about 8-12 minutes total). Immediately pour onto a parchment-lined sheet pan and let cool completely at room temperature for 30-45 minutes. Once hard, break into pieces and chop into roughly 1/4 inch chunks. You'll have about 3/4 cup; you need 1/2 cup for the cookies.
- 2Brown the cookie butter: Melt butter in a light-colored pan over medium heat until it turns golden brown with a nutty aroma. Transfer to a heatproof bowl and let cool.
- 3Whisk together flour, cornstarch, baking soda, and salt.
- 4Beat the cooled brown butter with both sugars until combined.
- 5Add the egg yolk, vanilla, and sourdough starter and mix until smooth.
- 6Fold in the dry ingredients until just combined.
- 7Fold in the chocolate chips and chopped toffee.
- 8Chill the dough for at least 30 minutes (up to 48 hours for best flavor).
- 9Bake at 350°F for 11-14 minutes using a 3 tablespoon scoop, or 8-10 minutes with a 1.5 tablespoon scoop. Go by visual cues, not the timer - pull when the edges are just barely browned and the centers still look slightly underbaked. Err on the side of underbaked for the best texture with the toffee.
- 10Scoot any uneven cookies immediately out of the oven using a round cookie cutter or wide drinking glass slightly larger than the cookie - swirl gently around each cookie in a circular motion while still hot to reshape into perfect rounds.
- 11Sprinkle with flaky sea salt while still warm. Cool on the baking sheet for 5 minutes, then transfer to a wire rack.
Made this recipe?
I'd love to know how it turned out! Your rating helps other mamas find the best recipes.
Rate & ReviewRate & Review This Recipe
Be the first to rate this recipe!
Enjoying this post?
Get more from-scratch recipes and kitchen tips delivered to your inbox weekly. Join 35,000+ families already following along!